Apple is a trusted company that has been making high quality electronics for quite some time. Every year they are consistently making improvements on their products, most especially the iPhones. The iPhone provides countless benefits, like quick access to various kinds of apps, top tier hardware and software integration and an amazing camera that allows you to capture 4K videos with crisp, clear audio. Because of the amount of features that this phone has, you will be able to create high quality videos that you could make with some of the best cameras in the photography world. There is so much potential that you can tap into with the iPhone’s camera, so here are 10 iPhone video recording tips that will help you get familiar with its features.
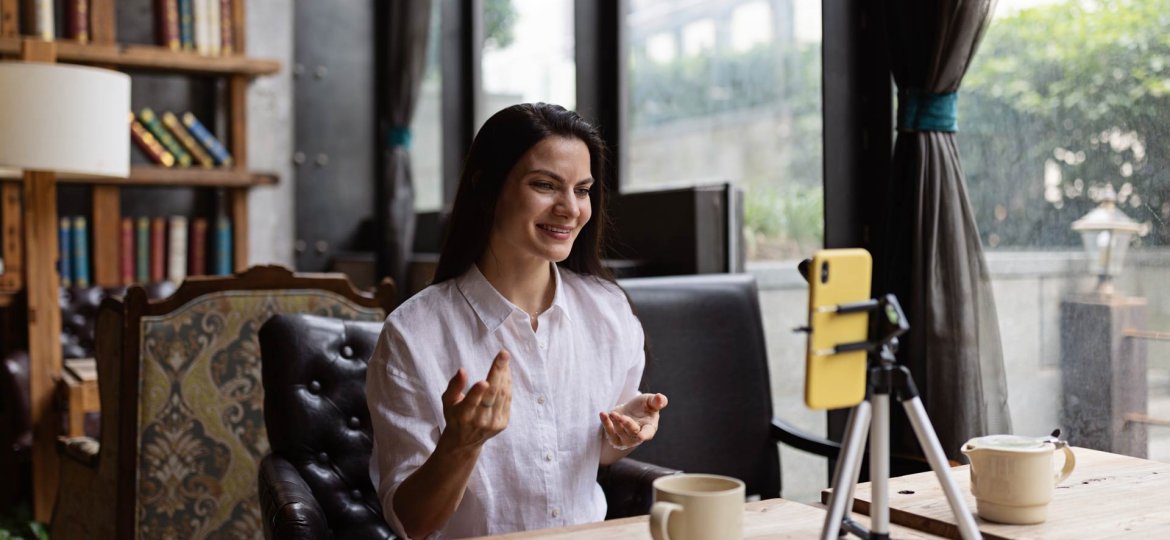
Film with a Tripod
The latest iPhones include optical image stabilisation, which makes filming great handheld footage a breeze. However, no matter how solid your hands are and how well your iPhone can stabilise itself, utilising a tripod and smartphone mount will always be superior. Many alternative mounts and tripods in the industry would suit the bill while still being able to get the job done. Most tripods cost approximately $30, with others costing considerably less. A feature you should look for in a tripod is the ability to level your phone and utilise it in portrait or landscape view. If you need to walk or shift around while shooting, it is recommended to purchase a gimbal for your phone, which will allow you to keep your footage smooth and undisturbed. If you do not have any of these gadgets and would like to shoot handheld videos, some techniques for stabilising your shot include keeping your iPhone close to your body, resting your elbows on a stable item nearby, and using your body to absorb bumps and shocks.
Shoot with Natural Lighting
It is best if you take your videos in an area that is surrounded by lots of natural lighting to get great and top quality iPhone footage. If you select a place with low lighting, the chances of your film being murky and on the low end in terms of quality will increase. So, if it is possible, you must select your shooting site with this in mind. If you’re filming during the day and need extra light, you can attempt to match the natural light with white lights.
Shoot with Back Camera Lens
Even when filming yourself, utilising the back camera to shoot videos will always appear better compared to using the selfie camera and this is because of various reasons. First off, the back camera contains more megapixels which enhances the quality of your photos and videos. In the back camera of your iPhone, it has 12 megapixels which is far greater than the 7 megapixel camera in the front of your phone. Furthermore, the lens in the back camera produces more clear and sharp images, since Apple focused more on the features of the back camera than the front camera. Moreover, if you are shooting while moving or while you are in areas that have less light, the back camera will come in more handy because it has a faster lens that produces better quality images and reduces the chances of having blurry outcomes.
Don’t Zoom, Move Closer
If you have an iPhone and need to zoom in, it is best that you do it the old-fashioned way by bringing your phone closer to the topic rather than utilising the phone’s zoom function. Because the iPhone’s lens does not optically zoom, it is best that you move forward and take your video from there. Because the iPhone does not do this , pinching to zoom just digitally enlarges the image. This implies you’ll ultimately be immersed in the realm of unattractive pixelation. Bringing the camera closer to your object or whatever you’re capturing will result in a much crisper image. If your phone has several lenses, the ultra-wide and telephoto lenses will be useful as well. However, take in mind that the normal 1x lens will perform the best in low-light settings.
Use Built-In Grid Feature
If you’re unsure how to construct a good image brings what you’re capturing all together, utilise your iPhone’s built-in grid and frame your subject according to the rule of thirds. Using the guidance of the grid and the rule of thirds, you may position your subject so that they are in the centre of the clip or wherever you want them to be. For example, if you want the subject to be on the side of your shot while still being the focal point, you may align them with the right line provided by the built-in grade. To enable the grid on your iPhone, go to settings, then camera settings, and then toggle the grid option.
Make Use of Your Other Apple Gadgets
If you have an Apple Watch, a cool trick that you can try out is to Make use of your Watch as a little preview window to assist you frame your image. It’s quite useful if you’re shooting alone and still want the results that you would get if you were shooting with a colleague. If you do not have an Apple Watch, there is nothing to worry about because you may also use any other Apple gadget of yours. For instance, you may also utilise your MacBook as a preview monitor by AirPlaying your screen from your phone.
Lock in Your Exposure
The iPhone will focus and expose your photo automatically. This is an excellent tool for rapid shots, but when capturing a video of a dynamic subject, it may make things very difficult. The iPhone constantly adjusts and refocuses, which might result in shaky footage and lighting changes midway through the shoot. That is why most strongly advise you to use the exposure/focus lock option. It will aid in maintaining consistent focus and exposure while filming. To focus, tap the screen, and then move the sun slider up or down to expose the photo. Once you’ve got the look you like, click and hold the focus and exposure boxes to lock them in. There’s also a handy exposure slider if you merely want to lock in the exposure but not the focus. To do this, click the carrot and then the exposure icon and then slide left and right.
Use Another Iphone for a Microphone
A good sounding video is more important than you believe! Getting your microphone as near to your subject as feasible is a basic rule for good audio in a video. If you can’t keep your phone close to your subject’s lips while shooting, you should use another iPhone as a microphone if you can. Making a basic voice memo will suffice! To do this, you must open the Voice Memos app, then either position the phone upside down in a pocket of your top or just out of the camera’s frame, just over your subject’s head.
Try Out iPhone’s Shooting Modes
If you want to be even more creative, the iPhone includes a few useful shooting options that can help your film stand out. To begin, the cinematic mode replicates the appearance of high-end film cameras by isolating your subject with a little blur. Slow-motion mode may be utilised to make even the most mundane occurrences appear grandiose. Finally, the time-lapse mode may show how something comes together over time, such as putting up a video shoot. When it comes to time-lapse films, some helpful hints include using a tripod, setting the focus and exposure for smooth and natural lighting changes, and placing your phone on flight mode before hitting record.
Don’t Email or Text Your Videos to Your Computer
Texting or sending your movies to your personal computer will almost always result in low-quality footage. Because recordings are compressed when delivered by text or email, these kinds of things are bound to happen. For example, your 50MB video may be reduced to 3MB. That much compression will result in grainy and fuzzy video. It’s a major issue since you need the highest quality footage available for the editing step.
The good news is that there are methods for preserving video quality while transferring videos to your computer! You may transfer the video by connecting your phone to your computer and using Image Capture and you may also AirDrop your clip to your MacBook.
Iphone cameras are just as amazing as any other camera in the photography industry and it is a great way to save your money if you are looking to become a videographer. The iPhone camera comes with various features that include various shooting modes and a built-in grid. Some tips to make the best out of your filming session with your iPhone camera include filming with a tripod, shooting with natural light, shooting with the back camera lens, moving in closer instead of zooming in, using the built-in grid feature, making use of your other Apple gadgets, locking in your exposure settings, using different shooting modes and refraining from texting or emailing your end results to your computer. By following these tips and tricks, your filming sessions with your iPhones will come out perfectly and will be well worth your time.